A bit of history
Franklin Bookman devices were early eBook readers with plug in ROM cards that distributed (mostly) reference content. Later iterations could read user-written memory cards containing licensed content. These models often came with a “connectivity kit” that included
- a serial / USB data transfer cable
- a 2MB / 4MB read-write memory card
- a CD-ROM with the Bookman Desktop Manager software 💿
- ☝️ Contents of this are of great interest
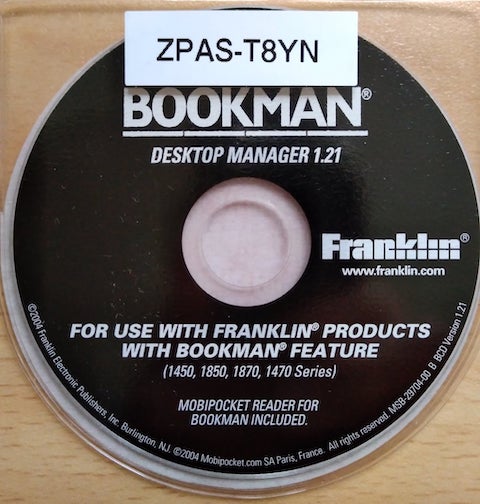
Example of a CD with a key code sticker
DRM scheme
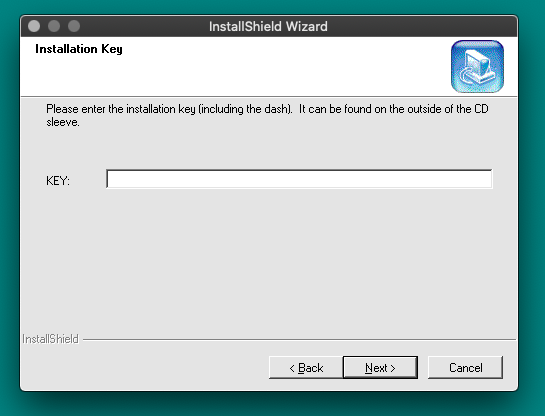
Installing the Bookman Desktop Manager (BDM) requires the entry of a valid CD key. This unique key was used to generate a PID (Peripheral IDentification) number that was bound to a Franklin.com consumer account. eBooks with DRM could then be bought and downloaded from the DRM servers, ensuring only a single user could write the content to memory cards with their BDM program.
 |
 |
As part of ongoing research for the reverse engineering side of the Bookman Archive, I wanted to probe deeply into the workings of BDM; after all, it contained all the Bookman3 data transfer code that would prove useful in further technical investigations.
Though several examples of CD-keys along with the different versions of BDM were graciously donated, I could not resist the reverse engineering challenge in front of me. My goal was to create a CD-key generator that would allow anybody to defeat the CD-key validation step of the BDM install program.
Even if you could generate a CD-key, it was highly unlikely this could be used to download paid content free of charge for many reasons. Franklin.com stopped operating its eBook download service sometime in the late 2000s, making downloads impossible for everybody, including users with “real” CD-keys. So ethically there were no issues either.
With that out of the way, let’s walk through the process.
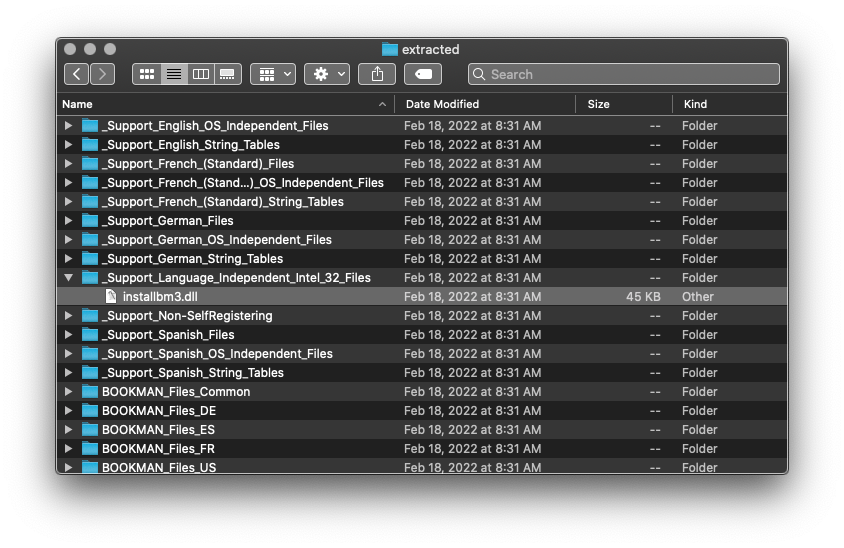
Step 1: Extract the InstallShield files
The BDM setup program used InstallShield as the setup platform to run custom logic and put files in their final destinations. Extract all of the files with unshield.
# Install `unshield` in MacOS
brew install unshield

# Go within the directory where the InstallShield file `data1.cab` is located and extract all files from
# this setup package into a directory called `extracted`
unshield x data1.cab -d extracted
You will find a file called installbm3.dll. This contains all the PID and CD-key validation logic. We need to look inside.
Step 2: First look at the file in Ghidra
Ghidra is a software reverse engineering toolkit that allows us to pick apart compiled code in various ways. We will use this to analyze exactly what the validation logic is doing.
When you are opening the installbm3.dll file for the first time, Ghidra will ask if you want it to auto-analyze the binary content after correctly identifying it as a little-endian x86 32-bit PE format DLL.
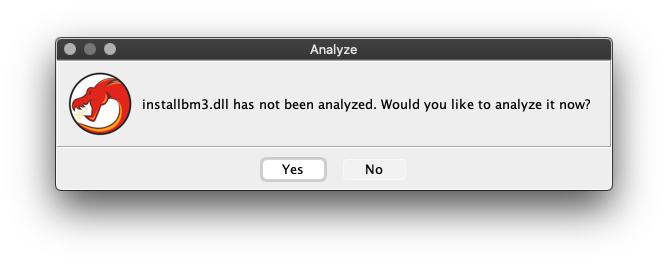
Say yes; it will identify two exported functions from the shared library: entry and install.
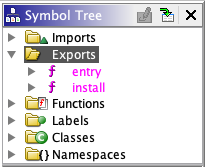
Also identified are several long strings of interest:
"203: Invalid symbol"at address0x10007080"204: Invalid check digit"at address0x10007094"202: Wrong length"at address0x100070b0"201: Missing '-'"at address0x100070c4
This last string is most interesting because we know valid CD-keys always contain a dash between a front 4 digits and rear 4 digits. We can check what code references this string: the instruction at address 0x10001012. Looking at the decompiler window, the instruction forms part of an IF statement, part of a function that contain returns with some of the other strings; highly likely this is the validation function.
Step 3: Analysis of the logic flow
Decompilation makes it fairly clear at this point:
char * __cdecl FUN_10001000(int param_1,uint *param_2) {
char *pcVar1;
uint uVar2;
uint uVar3;
uint uVar4;
uint uVar5;
uint uVar6;
uint uVar7;
uint uVar8;
int iVar9;
char local_c [12];
if (*(char *)(param_1 + 4) != '-') {
return s_201:_Missing_'-'_100070c4;
}
if (*(char *)(param_1 + 9) != '\0') {
return s_202:_Wrong_length_100070b0;
}
iVar9 = 0;
do {
if (iVar9 != 4) {
pcVar1 = FUN_10001110((int)(local_c + iVar9)[param_1 - (int)local_c]);
local_c[iVar9] = (char)pcVar1;
if ((char)pcVar1 == -1) {
return s_203:_Invalid_symbol_10007080;
}
}
iVar9 = iVar9 + 1;
} while (iVar9 < 9);
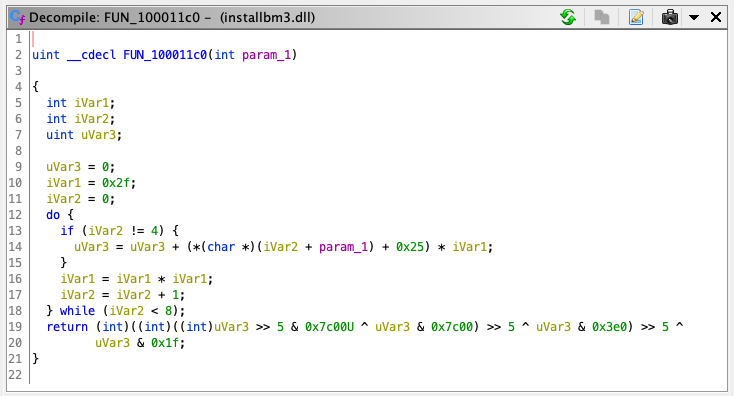
uVar2 = FUN_100011c0((int)local_c);
if (uVar2 != (int)local_c[8]) {
return s_204:_Invalid_check_digit_10007094;
}
uVar2 = FUN_10001220((int)local_c[0],0x1e);
uVar3 = FUN_10001220((int)local_c[1],0x19);
uVar4 = FUN_10001220((int)local_c[2],0x14);
uVar5 = FUN_10001220((int)local_c[3],0xf);
uVar6 = FUN_10001220((int)local_c[5],10);
uVar7 = FUN_10001220((int)local_c[6],5);
uVar8 = FUN_10001220((int)local_c[7],0);
uVar2 = FUN_10001140(uVar2 | uVar3 | uVar4 | uVar5 | uVar6 | uVar7 | uVar8);
*param_2 = uVar2;
return &DAT_10007078;
}
Translating into plain English pseudo-code:
- Take in 2 arguments: a C string, and a pointer
- Check if the 4th character is a dash, return with an error message if not
- Check if the string is 9 characters long, return with an error message if not
- Apply a function to each character of the string, excluding the 4th character “-” and store it in an
char[12]array - Use the
char[12]array to generate a check digit and compare it with the last digit of the same array - Check if the generated check digit matches the last digit, return with an error if not (We can definitely say that last digit of the CD-key is used as a check digit)
- Do some bitwise operations with the
char[12]array values to generate another value (possibly the PID) - Store that PID value at pointer argument location
- Return with an address of some unknown
Looking into #4 here, we see the function applied to each character calls a standard library function strchr that returns either the pointer to the first instance of a character found within the search string or a null pointer. The search string references a 32 length C string at address 0x10007030 that has the value 26B0KEL1AFD9M38T5NPGZ7XHYV4WJRCS. I strongly believe this is the set of valid CD-key characters.
The function from #4 then returns either the value -1 or a number between 0 and 31 inclusive (the index of the character within the search string).
Finally, the function from #5 takes only a single argument: a char *, and proceeds to perform some sort of bitwise transformation on each of its 7 members (skipping the dash character index) to pack into a single uint value as the return.
This was definitely the most cryptic part so far.
Step 4: Try to recreate the mechanism
Possessing all of these findings, along with a list of known valid CD-keys, I attempted to write some NodeJS code to regenerate the check digits. If the generated check digit matched the last digit of the known valid CD-keys then we could be confident a keygen could be created!
const VALID_DIGITS = '26B0KEL1AFD9M38T5NPGZ7XHYV4WJRCS';

function translatePID7toOffsets(pid7) {
    const offsets7 = new Uint32Array(8);
    for (let i = 0; i < 8; i++) {
        if (i !== 4) {
            offsets7[i] = VALID_DIGITS.indexOf(pid7[i]);
        }
    }

    return offsets7;
}

// Translated from C code to JS
function getCheckDigit(pid7Offsets) {
    const multiplier = new Uint32Array(1);
    let index = 0;
    const checkDigit = new Uint32Array(1);;
    multiplier[0] = 0x2f; <<<<<<<<<<<<<<<<<<<<<<<<<<<<<<<<<<<<<< !

    do {
        if (index != 4) {
            checkDigit[0] += (pid7Offsets[index] + 0x25) * multiplier[0];
        }

        multiplier[0] *= multiplier[0];
        index++;
    } while (index < 8);

    const digitCharCode = ((checkDigit[0] >> 5 & 0x7c00 ^ checkDigit[0] & 0x7c00) >> 5 ^ checkDigit[0] & 0x3e0) >> 5 ^ checkDigit[0] & 0x1f;


    console.log(multiplier);
    console.log('digitCharCode', digitCharCode);

    return VALID_DIGITS.substr(digitCharCode, 1);
}

// Known valid CD-keys (from photos)
`HG7S-W0TT
ZPAS-T8YN
7PVG-VGNK
XXAC-V8DH
HMLS-WGF6
ZFXX-N8L3
HGNG-9W8R`
    .split('\n')
    .map(a => a.trim())
    .map(a => console.log(a, getCheckDigit(translatePID7toOffsets(a))))
No matter what I tried, this first draft of the code would not produce the correct check digit…
$ node cd-keygen.js
1906018618
digitCharCode 6
HG7S-W0TT 4
-1400466497
digitCharCode 11
ZPAS-T8YN 7
1928381235
digitCharCode 27
7PVG-VGNK E
1319657504
digitCharCode 9
XXAC-V8DH H
-344035836
digitCharCode 19
HMLS-WGF6 3
1035679003
digitCharCode 8
ZFXX-N8L3 Y
-2131405270
digitCharCode 4
HGNG-9W8R J
The getCheckDigit() function was definitely not behaving the same as its decompiled C counterpart.
Step 5: Learn something
Running through the logic in my head and in a NodeJS REPL, it struck me: 0x2f continuously squaring itself. Surely the multiplier variable that I’d been using was being overflowed within 2 or 3 iterations of the loop both in C and in JS. Why would the code produce an overflow here?
I slept on this question for a day only to produce a further question:
- What happens when you overflow an
unsigned intvalue in C (compiled in 32-bit x86)?- Signed integers overflows cause undefined behavior: i.e. anything can happen (not deterministic)
- Unsigned integers overflows wrap around in 2^N modulo and IS DETERMINISTIC
Answering that, I started to realize that the deterministic overflow being used in that function meant the developers were doing this intentionally! And sure enough, after modifying the JS code to align with C-style unsigned int behavior (through the use of the js-cuint package)…
const { UINT32 } = require('cuint');

const VALID_DIGITS = '26B0KEL1AFD9M38T5NPGZ7XHYV4WJRCS';

function translatePID7toOffsets(pid7) {
    const offsets7 = new Uint32Array(8);
    for (let i = 0; i < 8; i++) {
        if (i !== 4) {
            offsets7[i] = VALID_DIGITS.indexOf(pid7[i]);
        }
    }

    return offsets7;
}

// Must replicate C uint overflow behaviors
function getCheckDigit(pid7Offsets) {
    const multiplier = UINT32(0x2f);
    const checkDigit = UINT32(0);

    let index = 0;
    do {
        if (index != 4) {
            checkDigit.add(UINT32(pid7Offsets[index] + 0x25).multiply(multiplier))
        }
        multiplier.multiply(multiplier);
        index++;
    } while (index < 8);

    const checkDigitInstances = [
        checkDigit.clone(),
        checkDigit.clone(),
        checkDigit.clone(),
        checkDigit.clone()
    ];

    const digitCharCode = ((checkDigitInstances[0].shiftRight(5).and(UINT32(0x7c00)).xor(checkDigitInstances[1].and(UINT32(0x7c00)))).shiftRight(5).xor(checkDigitInstances[2].and(UINT32(0x3e0)))).shiftRight(5).xor(checkDigitInstances[3].and(UINT32(0x1f)));

    return VALID_DIGITS.substr(digitCharCode, 1);
}

// Known valid CD-keys (from photos)
`HG7S-W0TT
ZPAS-T8YN
7PVG-VGNK
XXAC-V8DH
HMLS-WGF6
ZFXX-N8L3
HGNG-9W8R`
    .split('\n')
    .map(a => a.trim())
    .map(a => console.log(a, getCheckDigit(translatePID7toOffsets(a))));
I successfully replicated the code to generate the final digit. Great success!
$ node cd-keygen.js
HG7S-W0TT T
ZPAS-T8YN N
7PVG-VGNK K
XXAC-V8DH H
HMLS-WGF6 6
ZFXX-N8L3 3
HGNG-9W8R R
7 digits with 32 characters possible for each digit gives a space of 32^7 = 34,359,738,368 or over 34 billion possible valid CD keys!
For a copy of the NodeJS source code, please see the file here: cd-keygen.js. I will likely add a web-based version of the keygen to the Bookman Archive as a result of this effort. Thanks for reading and I hope you learned something like I did!
Update 2022-02-21:
The web version of the CD keygen is now online and can be found here along with its source code.