Laser shooting prop gun
After finishing a few basic machining courses, I was very much tempted to explore inventing and making something which was not a test weld or a simple bottle opener from 18 gauge mild steel. Enter the raygun shooting saloon. Initial morsels of the idea were inspired by a few prior instances of this laser toy that are scattered throughout the Internet.
As most of the actual complexity lay in the programming of the microcontroller to poll for laser hits on the target, it was only natural to use this as my first actual machined project.
Proto-Raygun
Initial ideas for the design of the raygun were very vague. As the materials that were used were all scavenged out of the scrap bin, the pieces were chosen according to how much they looked like parts of a gun. Having no other plan than ‘just make it look like some kind of gun’, I defaulted to combining these materials randomly.
Although the result was half decent in terms of fit and finish, the piece resembled a Saturday-Night-Special more than a space-age raygun. Not exactly the look I was hoping for, if I didn’t want to get into trouble. To ensure things go smoothly for the next attempt, I headed to the virtual drawing board.
Sketchup results and better planning
Some time after the initial attempt, it dawned on me that having a well-defined plan for making this raygun would be a good idea. And after overcoming the tiny learning curve of Google Sketchup 8, this design popped out. Even if I couldn’t manage to fabricate anything within a beginner’s tolerance of the sketch, it could still be useful as a base to apply design changes later.
In a perfect world where I had complete mastery of all the tools and techniques of metalwork (or sent the design to Shapeways for 3D printing), this is what the end result should look like.
Progress
 One to one template of the grip plates. Didn’t have the materials to cut these straight out, so both plates had to be butt-welded and then cut. These will be joined together to form the box-grip which holds the AA cells.
 Trigger and trigger housing, prior to welding. As with the grip plates, I had to weld a few different scraps to get to the dimensions that were close to the CAD drawing. Laid a pair of AA cells on the plate to give an idea of how much inside space there is left to work with.
 Trigger housing turns into a single piece! Sadly a miscalculation made me cut more of the trigger plate than planned; jagged inner edges are off by about 0.25 in.
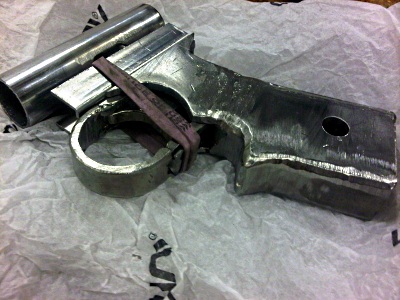
 Finally found some mild steel tubing of correct diameter in the scrap metal bin; promptly cut down to manageable size.
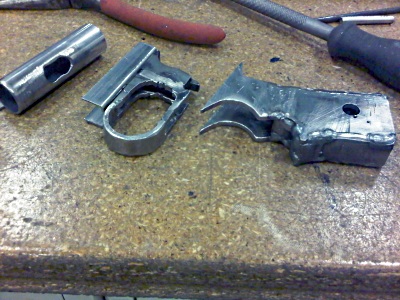 The 3 distinct segments of the raygun. Grip is finally a single piece! Grip receives more metal to bridge the gaps between the plates. The trigger itself is missing here.
 End of the night progress as of Aug. 10, 2012. Grip is basically complete. Battery cover still needs to be fit into this somehow, and mild metal finishing / filing to round out the boxy appearance of the grip. Far too much metal dust was inhaled.